Thursday, 5 February 2015

My Jewelry Making Trials and Creations

My Jewelry Making Trials and Creations :

I am Novice to Jewelry Making and doesn't know how to do it , what materials to get, where to get, how to get started . I did not like going for classes, and I haven't attended any classes so far. I consider self learning is the best method, so google helped me a lot. Though first I could not find out what things I need to make a simple earring. However I made a simple earring without any kits. My First Try is Peacock Earrings.

Recently, quilling has gained much popularity, and I was like " Why people are doing these crafts crazily, and what's use of it". I have seen quite few quilling Jewelry creations from Facebook and really amazed.

At bazar, I noticed the quilling kit and bought it. In that quilling kit there is one booklet of some designs , multicolor quilling strips , glue, stones and toothpicks. I started quilling and made few simple designs : My First Try Quilling Earrings.

I bought Jhumka Mould and made eight Jhumka of different sizes.

I was about to take the picture, but my first try Jhumka earrings got sold. I was quite happy about it.

Sorry some pictures were not taken  properly.. Sorry for the quality of the picture..


My Neighbor daughter wearing this mini jhumka. .
Mini Jhuma - Sold out!

gold jhumka quilling earring

Frog earrings

Blue Crystal chandelier earrings

Orange quilling earring
Red glass beads

Pink glass beads - sold out!

Blue  Tear Drop Crystal Earrings - Sold Out!

Glass and Crystal beads earrings - Sold out!

Pink beads earring

Swarovski tear drop earring - sold out!


yellow  glass bead earring - sold out!


These earring collections are my second try, but I am happy people liked this simple design and bought it from me.


Tuesday, 27 January 2015

My paintings - Remake and remade it


My paintings - Remake and remade it:

Like Movies remake, I remade my paintings too.

It seem to be seen somewhere. But its nowhere, it's in Malinicreationz....

My paintings were sold! So I remade it.

Radha Krishna paintings

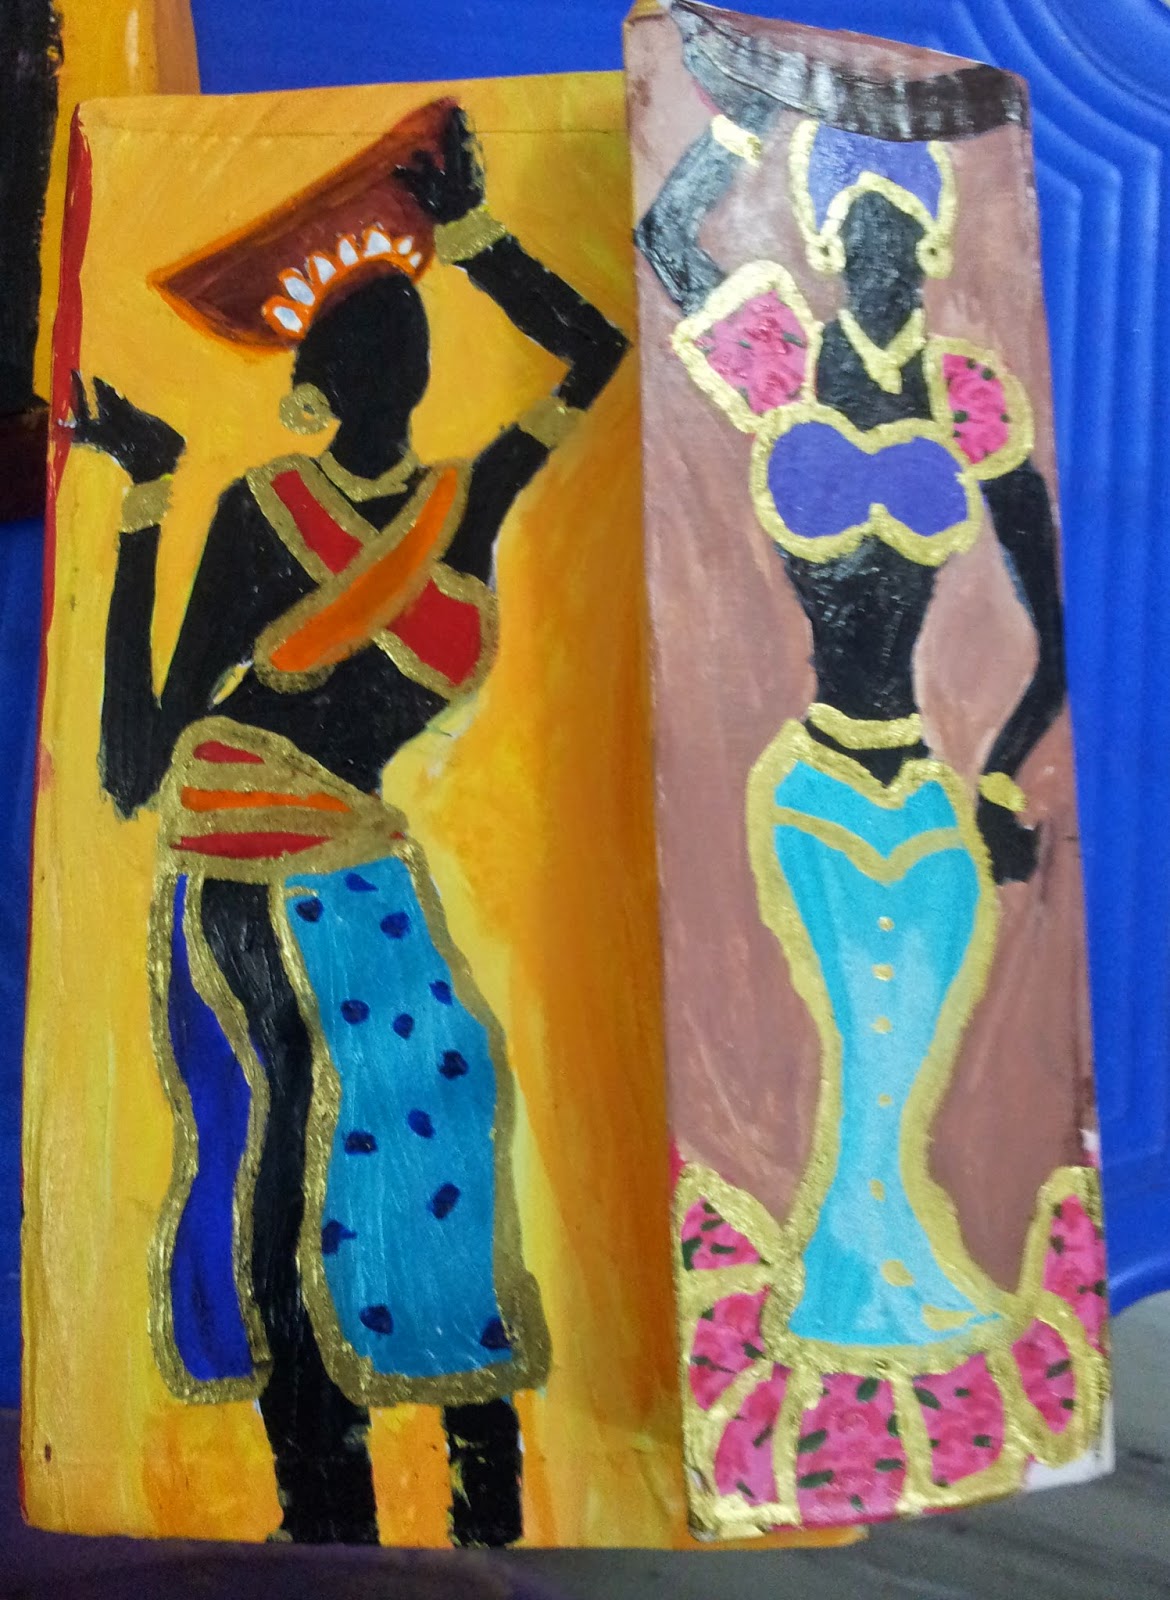
African paintings

Lord Venkateshwara paintings

For Venkateshwara paintings, I used stones and kundan stones..

Mirror wood stand - Home decor


Mirror stand - Home Decor

Mirror stand is a wood crafted and its plain  without any paint added. I painted gold color and final varnish coat is given.


Mirror stand decor

Mirror stand unpainted

Mirror stand decor

Lady with Hat fruits - Watercolor painting

Lady with Hat fruits - Watercolor painting.

My pencil sketch:


Opening Box Organizer

Opening Box Organizer:

Here, I am posting my first try of opening box organizer. A few years back I noticed this organizer in one of handmade paper products creations. I wanted to give a try, but never got a chance to do it. In one of the forums, they mentioned Republic Day patriotic crafts contest @ Indusladies. Suddenly, I thought of making it. I forget to take the step by step pictures. But sure , next time I would post the making pictures of  Organizer.

I painted the boxes on all four sides. Three sides - African theme and one side - Indian ( Hamsa Damayanthi).


opening box organizer

Tricolor - Inside the box

First side of the box

second side of the box

third side of the box

Hamsa Damayanthi

Tuesday, 20 January 2015

WallPaintings - First try

Wall paintings:

This is my first try and I did it within 45 minutes. Its is a free hand painting. I don't have patience, so I haven't given much importance to the lines.

wall paintings- close up

wall paintings - In my Bedroom


Sunday, 21 December 2014

Gifting Project - Diy

Gifting Project

Things Required:

1. Waste boxes
2. Glue
3. Painting or any designs of your choice
4. Glue
5. Thread
6. A pair of Scissors
7. Toothpick or hole puncher
8. Glitter tapes


Materials required for gifting project

Step 1: With the help of toothpick or puncher, poke two holes.


Step 2: Insert Thread and tie knot as shown in the pic.

Front - Inserting thread
Backside of the box
Step 3: Stuff the box with waste papers or tissue papers .


Step 4: Now, I have pasted my painting, and framed with glitter tapes.


Return gifts ready!

Radha krishna
Two parrots glass painting


Return gifts


Monday, 3 November 2014

My First Quilling Try Earrings


Once, I did not like quilling  and didn't understand why people are doing these quilling craft crazily. When it comes to jewelry, and looking at  amazing creations posted everywhere (Right from facebook to local store). That inspired me to try and experiment in quilling. I haven't went to jewelry or any classes so far. So with the help of google, I did things required for making ear jewelry.

I just went to local store with a list of items that I have to buy for making jewelry. But getting things at local store is tough task because I did not get and they said out of stock. So, I ended up buying these things below I have mentioned.

Things required :

Earring hooks 

Jump rings or connectors 

nose plier

Glue

Quilling tool

Quilling papers (available in different sizes and colors)


For making this round , I used a bamboo ice cream stick. Once u finished rolling, apply glue at the end. You would get a round bead as shown in pic. I made two beads from different colors. With the help of nose plier, I connected jump rings and hear hooks. Simple Quilling earring is ready,

Quilling earrings

My fourth experiment is Frog Quilling Earrings

Frog Quilling earrings

Quilling earrings -First try


The best part is even a novice like me can do quilling earrings. 


Quilling materials available at online store but the price is double from the local store. So, I prefer buying things  local storeee!!!!

Saturday, 4 October 2014

DIY ORGANIZER - How To Make It

DIY ORGANIZER :-


Things you'll require :-

Empty Boxes - of any size ( you can also try with matchboxes)

Cellotape

a pair of scissors

Waste papers or gift papers .


         These are empty gold winner boxes, I got if  from Mahesh Home Needs for free. You could also get boxes from nearby stores.
       

Step 1:-

Arrange the boxes, and  cut sides of each box.
Empty Cardboard Boxes


Step 2:- With the help of cellotape, wrap  three sides. It would look like this.


wrapped with Cellotape on all three sides


Step 3: I have covered with waste gift papers. Diy Organizer is ready.
Sticking waste gift papers 
Back view of organizer
I have sticked cardboard(white) at the base on each rack  because it holds more heavy things without breaking.

Carboard sticked at base


DIY Organizer is ready to use now. :-)